My awning gave me quite a fright once. A storm rolled in faster than expected — and I wasn’t home. When I got back, it was still up, but just barely. Clearly, the awning needed a wind sensor. The manufacturer conveniently had a solution ready — for €200. For a single sensor.
That was out of the question. An ESP8266 microcontroller, a wind sensor (anemometer) for around €20, and ESPHome solved the problem for a tenth of the price. Since then, the awning retracts automatically when the wind gets too strong — and I no longer have to worry about it.
What You’ll Need
To get started, you only need a few components:
- An ESP8266 microcontroller (buy here* - affiliate link)
- A wind sensor/anemometer (buy here* - affiliate link)
- A 5V power supply (e.g., an old phone charger)
- ESPHome (already installed)
- Your smart home hub — in this example, Home Assistant
If you’re not yet familiar with ESPHome, I recommend checking out this introduction first.
Measuring Wind
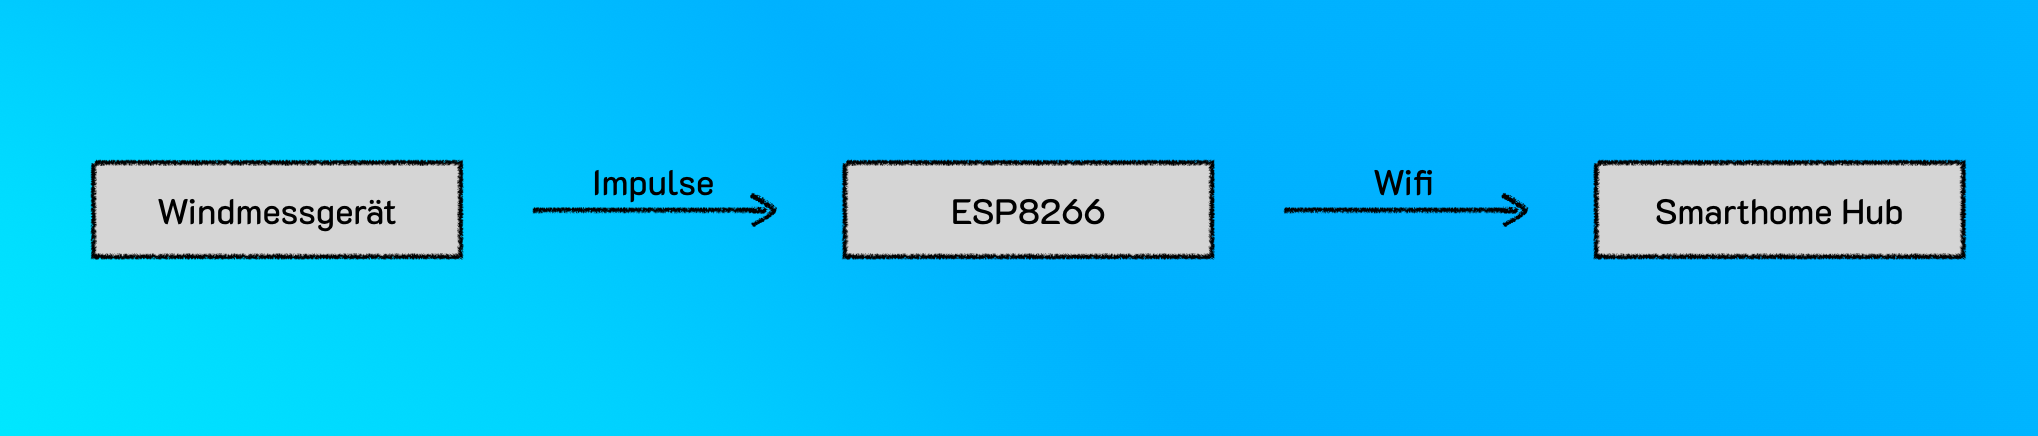
The anemometer measures wind movement via rotations. Each rotation generates electrical pulses that the microcontroller captures. Using a formula defined by the sensor model, the current wind speed is calculated and transmitted via Wi-Fi to your smart home hub.
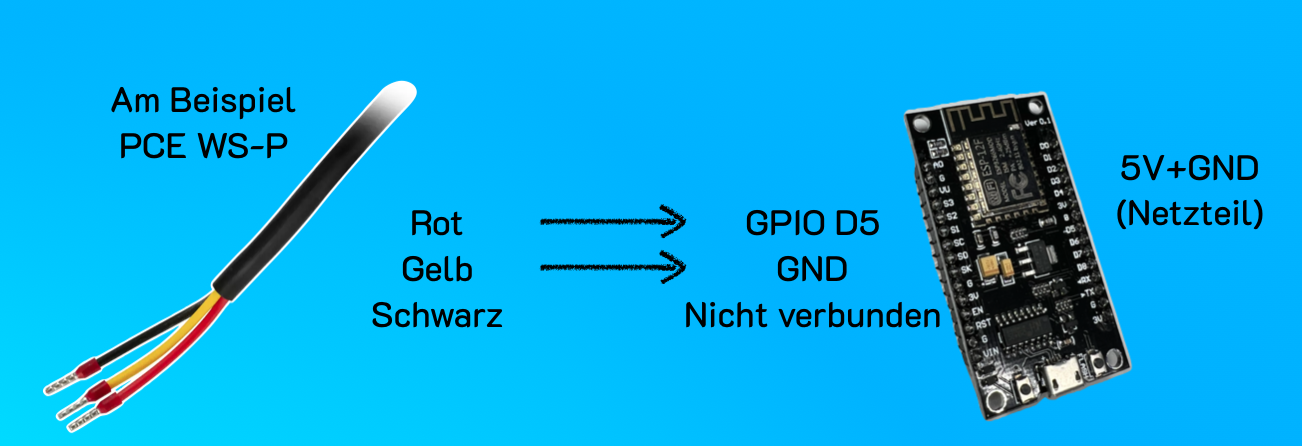
Wiring
Connect the cables of the wind sensor to the GPIO pins of the microcontroller. Use a standard 5V power supply to power the microcontroller — an old phone charger works perfectly. Important: Note which GPIO pin the wind sensor is connected to, as you’ll need this information later for the configuration.
Software Setup — Programming with ESPHome
Creating the Basic Configuration
Start with a simple configuration file in ESPHome. It contains the basic information your microcontroller needs, such as:
- The device name (e.g., “windsensor”),
- The platform (ESP8266 or ESP32, depending on your microcontroller),
- Wi-Fi settings (SSID and password of your network).
All of this happens in lines 1–26 below.
Defining the Sensor for the Anemometer
The wind sensor is configured as a pulse_counter. This module counts the pulses and calculates the wind speed using a filter (starting at line 37). We use the formula provided by the manufacturer in their documentation and apply it here as a lambda function in the sensor definition (line 62).
Calculating Averages and Wind Gusts
In addition to the current wind speed, average values and maximum wind speeds (gusts) are particularly useful. For this, you use template sensors with appropriate filters.
- Average value (
sliding_window_moving_average): Calculates the mean wind speed over the last 30 minutes (line 81) - Maximum value (
max): Stores the highest speed over the last 5 minutes (wind gusts) (line 96)
Here is the complete configuration:
|
|
Flashing the Configuration
Open ESPHome and connect your microcontroller via USB. Click “Install” and upload the configuration. Once the microcontroller has been programmed once, future updates can be flashed wirelessly (“Over the Air”).
Integration into Home Assistant
ESPHome makes integration particularly straightforward:
- Open Home Assistant.
- Navigate to “Settings > Integrations > Add Integration”.
- Select “ESPHome” and enter the IP address of your microcontroller.
- Enter the encryption key from your ESPHome configuration.
Once the integration is complete, you can view the recorded values (current speed, average, gusts) in Home Assistant and use them for automations.
What’s Next
With the collected wind data, you have a wide range of control options, for example:
- Automatically retract awnings when a critical wind speed is reached.
- Close roller shutters to protect windows during storms.
- Send warning notifications when extreme weather conditions are approaching.
Do you have questions or other ideas for what you can do with wind data? Write them in the comments — I’m curious what you’ll build with this.
Note: Links marked with affiliate link are affiliate links. As an Amazon Associate I earn from qualifying purchases. This means I receive a small commission if you purchase through these links — at no extra cost to you. The revenue helps me run this blog and YouTube channel and keep creating content. Thank you for your support!
― Joachim