
In the Home Assistant forum, someone opened their port 8123 in January 2025 – and described how login attacks started within minutes. Massive, automated, relentless. This is not an isolated case. Using services like Shodan, attackers can find open Home Assistant instances in seconds.
Most of these attacks are preventable. Not through complicated measures, but through five things that many people simply never set up.
Home Assistant was built with privacy and IT security in mind, letting you run your smart home completely locally and independently of manufacturers. The local approach minimizes the risk of data leaks. With options like SSL, user management, and regular updates, you can make Home Assistant one of the most secure vendor-independent solutions available – if you use the security features correctly.
Many users overlook important security features or don’t take full advantage of what Home Assistant offers. The problem: this creates unnecessary attack surfaces, so-called attack vectors, through which hackers could break into your smart home. Whether it’s weak passwords, unsecured connections, or outdated software – it’s often small oversights that can have major consequences.
In this article, I’ll show you 5 typical security mistakes and how to avoid them. I’ll give you tips to make Home Assistant even more secure. Whether you’re just setting up your smart home or have been using it for a while – these tips will help you identify potential vulnerabilities and better protect your home.
Mistake 1: Using Weak Passwords or Default Passwords
A classic that is still underestimated: weak or even pre-set default passwords. Many smart home devices connected to Home Assistant come with simple default passwords like ‘admin’ or ‘1234’. And the problem is: these passwords are not only easy to remember, they’re also easy to hack. Attackers use automated programs that try exactly these default passwords in seconds.
Why is this dangerous? A weak password can allow attackers not only to gain access to your smart home, but through Home Assistant to all your devices and automations. Imagine someone being able to control your lights, access cameras, or even disable alarm systems – that would be an absolute nightmare.
The solution is fortunately simple: change default passwords immediately after setting up your device. Use a strong password with at least 12 characters – length is more important than complexity here. Lowercase letters and digits are often perfectly sufficient, as long as the length is right.
Even better is using a password manager like KeePass. It not only generates secure passwords but also stores them securely, so you only need to remember one master password.
My tip: Give every user and every service in your smart home its own password. This minimizes the risk of a single compromised password putting your entire smart home at risk.
Mistake 2: Ignoring Firmware and Add-on Updates
Another major mistake that’s made frequently: not performing updates regularly. Home Assistant itself, as well as the devices you control with it, run on software that needs to be updated regularly – not just to get new features, but above all to close security vulnerabilities.
Why is this so important? Outdated software is a goldmine for hackers. When vulnerabilities become known – and this happens more often than you might think based on media coverage – attackers can specifically search for devices with those security gaps. One website, for example, automatically lists surveillance cameras found to be unprotected from access.
The good news: Home Assistant makes it easy to stay up to date. You can immediately see when updates are available on the dashboard. And with one click, you can install them. The same applies to custom components you’ve installed through the Home Assistant Community Store (HACS).
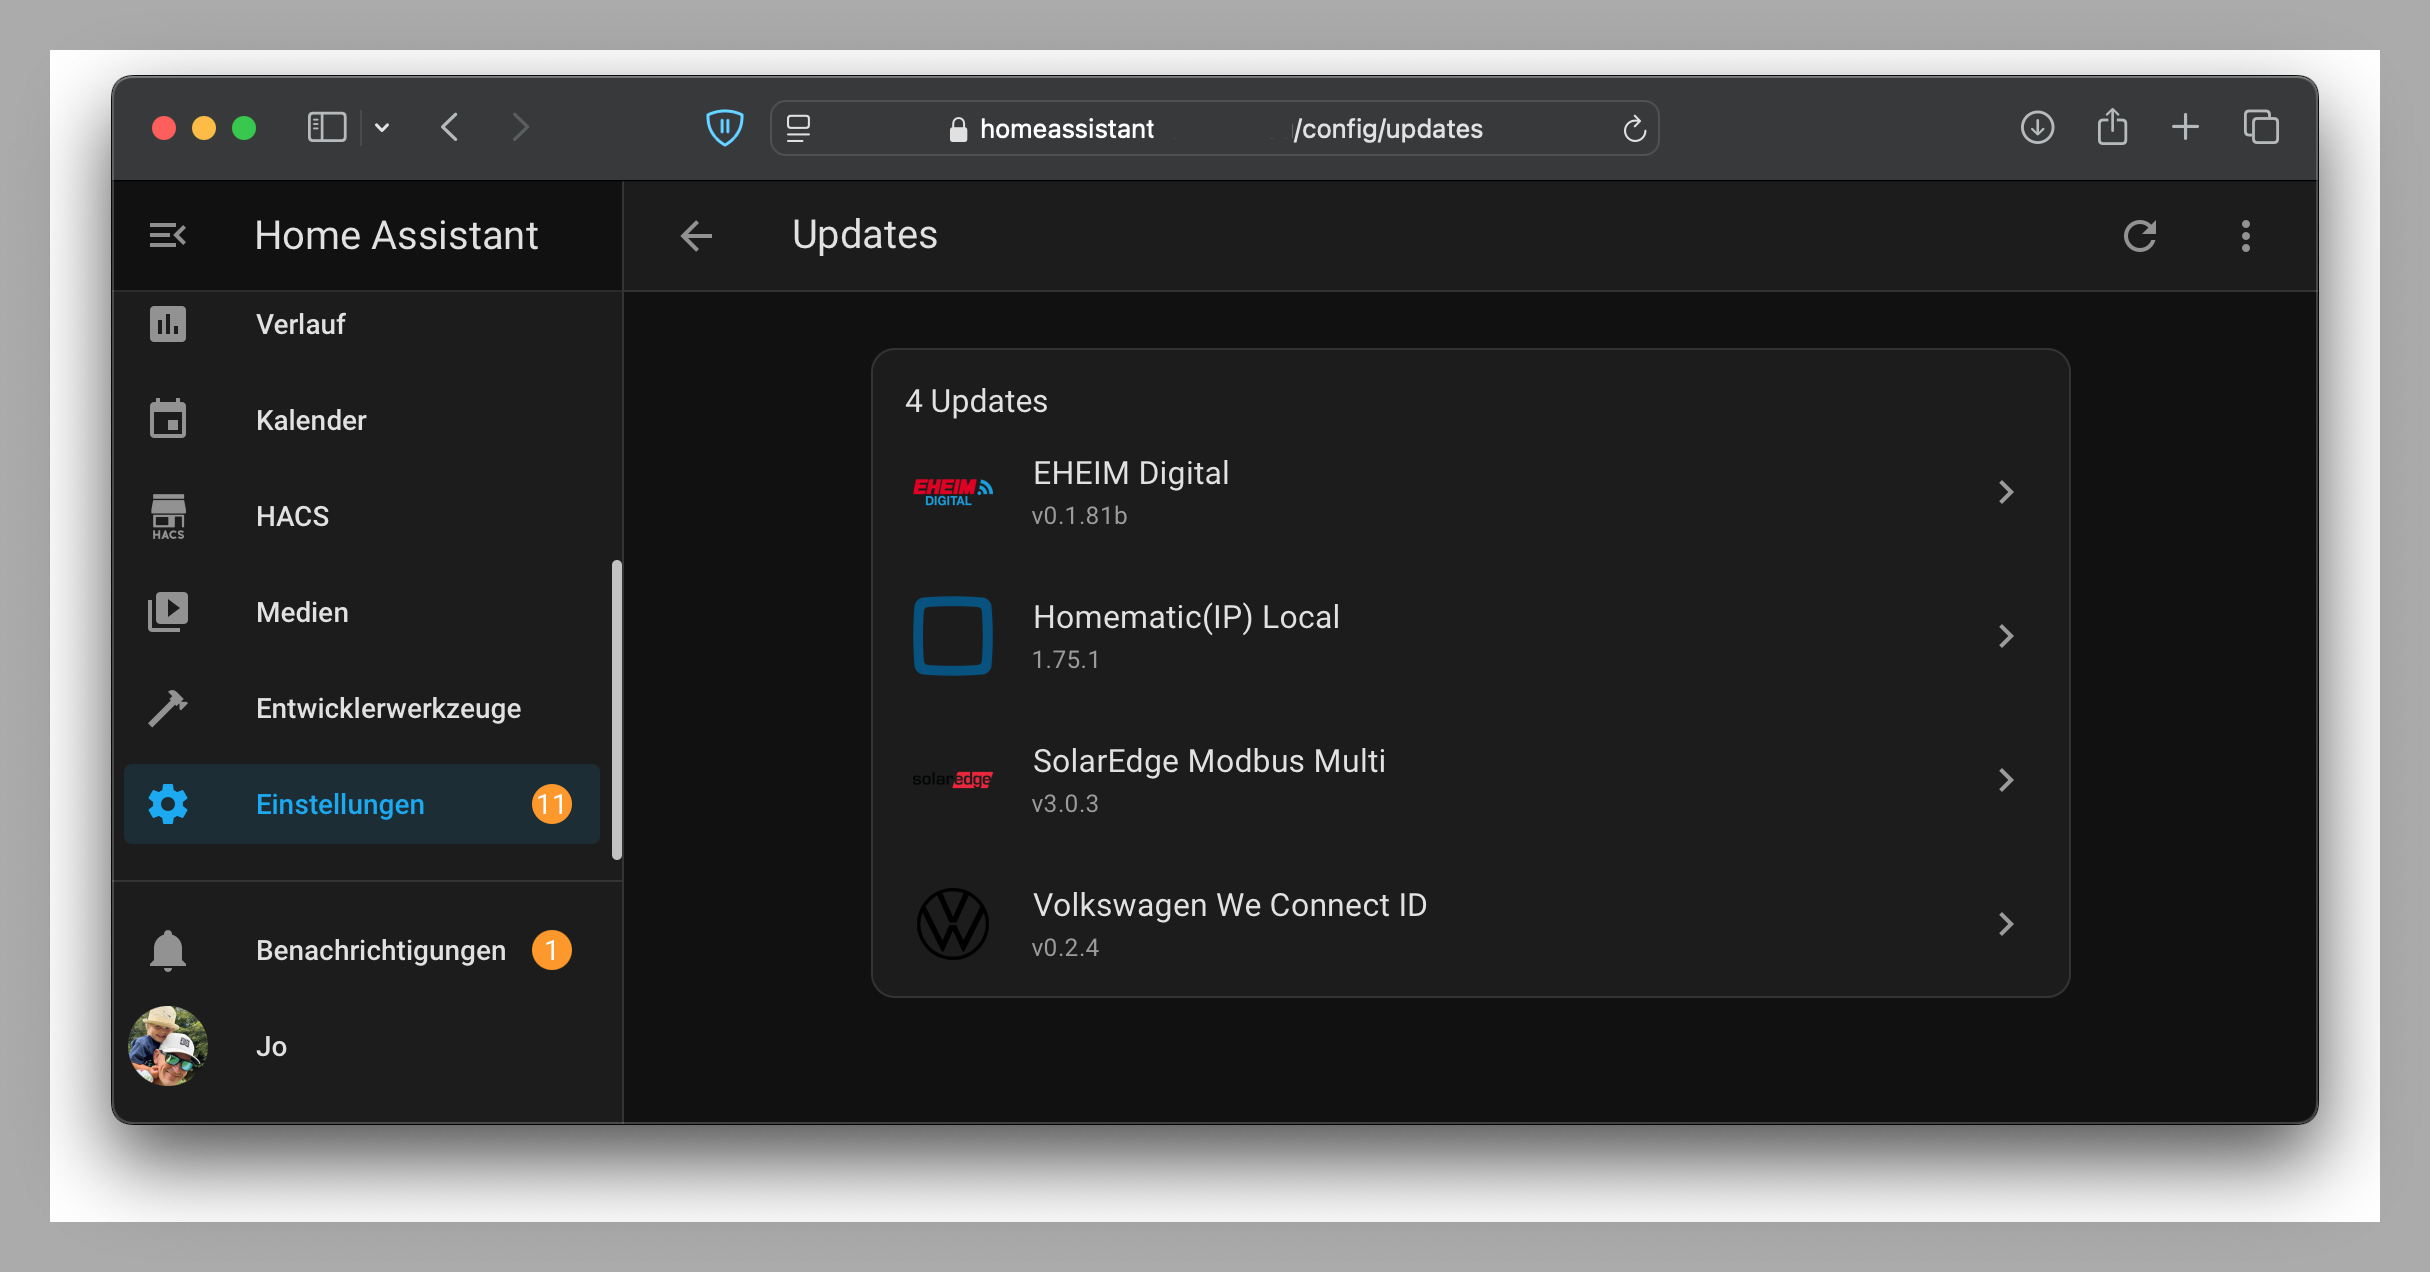
My tip: Schedule regular maintenance windows for your smart home – at least once a month. Set aside 15 minutes to apply all available updates for Home Assistant, your add-ons, and devices. This not only makes your system more secure but also ensures everything runs smoothly.
Mistake 3: Not Setting Up a Separate Network for Smart Home Devices
A common mistake many smart home users make: connecting all their devices – from lights to thermostats to cameras – to the same network used by their laptops, smartphones, and tablets. This sounds convenient at first, but it’s exactly what can become a problem.
What risks does this create? Smart home devices often have fewer security mechanisms than your laptop or smartphone. Many devices are only minimally secured or are based on older technologies that are vulnerable to attacks. If a hacker compromises a single device on your network – for example, a cheap smart plug or an unsecured camera – they gain the same access to your home network as a visitor in your home to whom you’ve given access to your private Wi-Fi.
The solution? Set up a separate network for your smart home devices. This sounds complicated, but it’s easier than you might think.
Most modern routers offer the option to create a so-called guest network. You can use this not only for visitors but also for smart home devices that communicate via the manufacturer’s cloud – because those are exactly the ones critical to the security of your home network.
Your Home Assistant installation, on the other hand, should be placed in your regular home network along with the smart home devices that don’t require internet communication. If you want to be extra safe, you can block those devices from accessing the internet through your router settings.
Some routers like FritzBoxes ([buy here – affiliate link])(https://amzn.to/3W6bgOr) or UniFi Access Points ([buy here – affiliate link])(https://amzn.to/4foMsb8) make it especially easy to set up guest networks and block access to the main network.
You can tell whether a smart home device communicates via the cloud in Home Assistant by checking the relevant integration. If it says “Dependent on the internet,” that integration and its associated device is such a candidate. Devices that don’t communicate with the internet but directly with your Home Assistant installation cannot be reached by a hacker from the internet and are therefore less critical.
Mistake 4: Not Using Two-Factor Authentication
A frequent mistake that often happens out of convenience or lack of awareness: not enabling two-factor authentication – or 2FA for short. Yet 2FA is one of the simplest and most effective measures to prevent unauthorized access to important systems like your Home Assistant installation and thus your smart home.
Why should you care? Imagine someone gets hold of your password – through phishing, a data leak, or because you reuse the password across services. Without 2FA, attackers can immediately access your Home Assistant and control your entire smart home: capture camera feeds, manipulate automations, or view sensitive data. With 2FA, however, they also need a second confirmation code generated only on your device – which makes it nearly impossible for hackers to hijack your account.
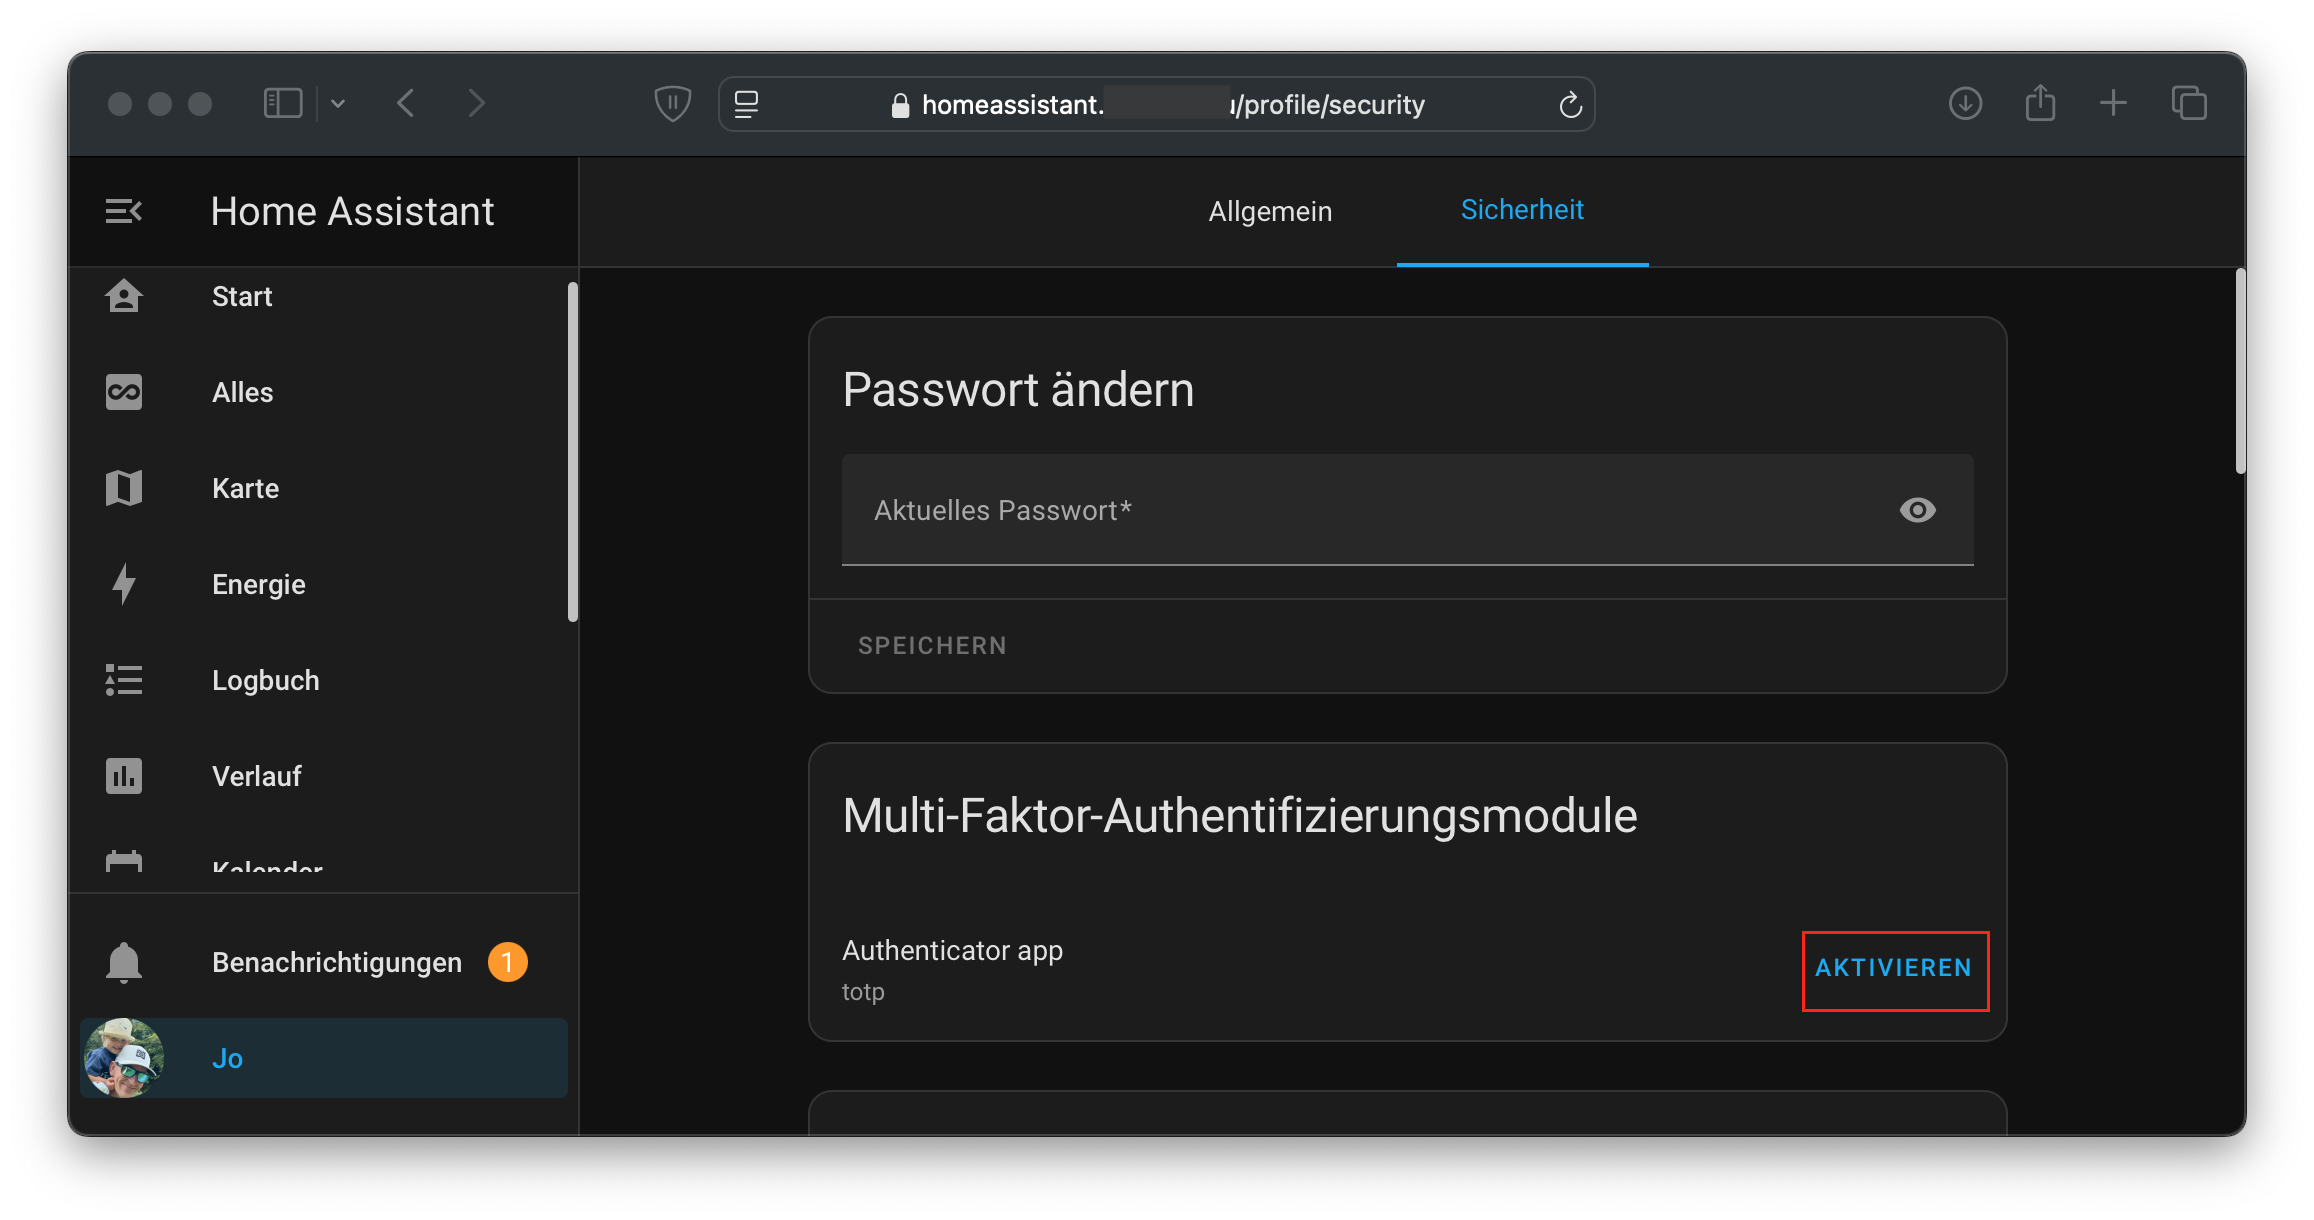
The good news: Home Assistant supports 2FA and makes setup straightforward. Simply go to Settings under Users and enable two-factor authentication. Use an authenticator app such as Google Authenticator, Authy, or Microsoft Authenticator. These apps generate new one-time codes every 30 seconds that you need to log in. Important: store the backup codes that Home Assistant generates in a safe place – for example, as a printout in a folder. This lets you recover your account if you lose access to the authenticator app.
My tip: Enable 2FA not just for your admin account, but for all users who have access to Home Assistant – especially for accounts other than your own. This gives you the assurance that nobody can unauthorized manipulate your system, regardless of the permissions of the associated user or how carelessly other users handle their passwords.
Mistake 5: Integrating Insecure or Unknown Devices into Home Assistant
One of the biggest advantages of Home Assistant is that you can integrate devices from a wide variety of manufacturers. This makes your smart home extremely flexible, but it also comes with risks. Many users buy cheap smart home devices from unknown or questionable manufacturers without checking how secure they actually are.
Why is this a problem? Insecure devices can act like a Trojan horse: if they are poorly programmed or intentionally built with backdoors, hackers can use these devices as an entry point into your network. Some cheap devices even send data unencrypted to servers you can’t control. This allows attackers not only to spy on your private data but also to gain access to other devices on your network.
The solution? Buy devices from reputable manufacturers: make sure they provide regular firmware updates and support established standards like Zigbee, Z-Wave, or Matter.
Check data transmission: use local integrations that communicate directly with Home Assistant, rather than devices dependent on a cloud. Platforms like Zigbee2MQTT or ESPHome are ideal because they give you full control over your data. Block unnecessary traffic: with tools like a modern router or firewall, you can prevent devices from communicating with the internet without authorization.
My tip: Be cautious with extremely cheap devices or products that offer little documentation or support. Infrequent updates can also be a warning sign. If you’re unsure, check reviews or community discussions about a device before buying – you’ll find out whether there are known vulnerabilities, whether the device should be considered potentially problematic, and how often updates are released.
Conclusion
Avoiding these five security mistakes takes you a big step toward a more secure smart home. Which security measures are you already using? If you have additional tips, feel free to share them in the comments.
Note: Links marked with affiliate link are affiliate links. As an Amazon Associate I earn from qualifying purchases. This means I receive a small commission if you purchase through these links — at no extra cost to you. The revenue helps me run this blog and YouTube channel and keep creating content. Thank you for your support!
― Joachim
Related Articles
- These 5 Automation Mistakes Every Home Assistant User Has Made – Before security is solid, automations need to be reliable
- 5 More Home Assistant Automation Mistakes – Are You Affected? – Newer pitfalls around trigger IDs, script modes, and AI-generated automations