
Shellys are small, affordable, and powerful. And yet the same mistakes come up again and again during installation – some just annoying, some genuinely dangerous. Here are the five I see most often.
Mistake 1: No Neutral Wire – Installed Anyway
Many older installations in Germany have no neutral wire in the switch box – normally the blue wire, sometimes grey in older setups. Instead, you only find the live and switch wires.
Some Shelly models offer a “No-Neutral” mode. Sounds tempting – and it works in many cases. The problem: in No-Neutral mode, a small residual current always flows through the load. Whether this causes flickering or simply doesn’t work at all depends on the LED driver. Shelly specifies minimum load values – many modern, highly efficient LEDs fall below them. The mistake isn’t No-Neutral itself, it’s installing without testing first.
What helps: First check whether a neutral wire is available in a cable duct or distribution board – it’s often there, just not routed to the switch box. If there really isn’t one: choose a Shelly model that explicitly supports No-Neutral, install it, test it – and only then put the switch cover on.
Dangerous edge case: Some people, lacking a neutral wire, reach for the green-yellow protective earth as a return path. This is life-threatening. The protective earth is not a neutral wire substitute – misusing it can put the housing of connected devices under voltage.
Mistake 2: Too Little Space – The Hot Box
Shellys are small. But not so small that they fit effortlessly into every flush-mount box – especially when there’s already a light switch and several cables in there.
The symptom: the box gets warm. That’s heat with nowhere to go because the Shelly is squeezed in. Shellys have a built-in temperature limit – when it gets too hot they shut off automatically. That sounds like a safety feature, but it’s a sign something is fundamentally wrong.
What helps: Check before installing whether the space is genuinely sufficient. Don’t squeeze, don’t bend. If in doubt, have a deeper box fitted. Also: in the Shelly settings there’s an Eco Mode (Web UI → Settings → WiFi → Eco Mode) that reduces Wi-Fi transmit power when idle, which also lowers self-heating. I enable it as a matter of course.
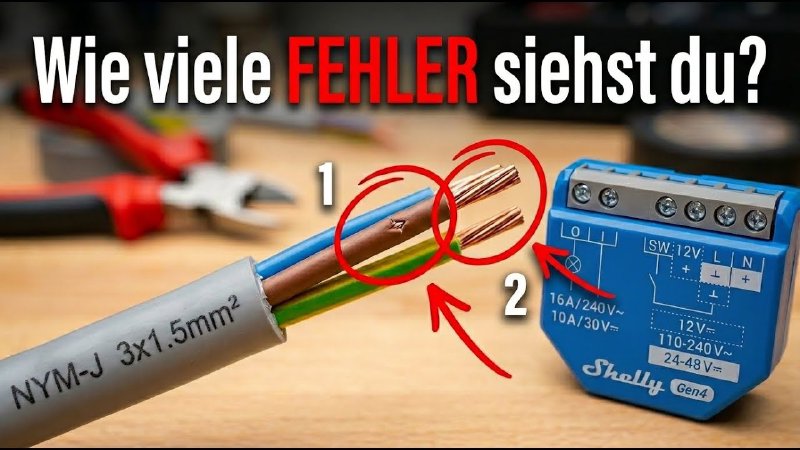
Mistake 3: Wrong Tools – Nicked Wires
Side cutters along the side of the cable – almost everyone does it. The outer sheath comes off, looks tidy. Until you look more closely: a nick in the wire insulation is almost inevitable this way. Sometimes just a small scratch. You can barely see it – but under load or over time, that’s exactly what can cause a short circuit or insulation failure.
What helps: Two tools solve this permanently:
- Cable stripping tool (I use the Knipex ErgoStrip*): One rotation around the cable and the outer sheath is cleanly separated – without touching the wires.
- Self-adjusting wire stripper (Knipex PreciStrip*): Detects the wire cross-section automatically, cuts only the insulation, no nicked copper.
Once you’ve tried them, you’ll never reach for side cutters again.
Mistake 4: Bad Connections
The right tools alone aren’t enough – there are three typical mistakes when making the actual connection:
Wrong Strip Length
Too short: the terminal barely grips the copper, contact resistance increases, the connection runs hot. Too long: bare copper protrudes beyond the terminal – short circuit risk to the neighbouring terminal.
The correct length is in the manual for your Shelly model – usually 6–7 mm.
Clamping Stranded Wire Directly
Anyone working with extensions or flexible cables is dealing with stranded wire. Clamping stranded wire directly into a screw terminal is a fire hazard: the individual strands bend, oxidise, and the connection deteriorates over time.
Tinning Stranded Wire – Sounds Good, Is Wrong
Tinning stranded wire before clamping it sounds like a good idea. It isn’t. Solder deforms under sustained clamping pressure – this is called cold creep. The connection that felt solid at installation will work loose over time. It’s not a question of whether, but when.
The Right Solution: Ferrules
The solution is the ferrule – a small metal sleeve you slide over the stripped stranded wire and crimp with a ferrule crimping tool. Once crimped, it behaves like solid wire in the terminal. The Knipex ferrule crimper* makes this quick and precise.
Mistake 5: Working Live
Before you do anything at a flush-mount box, there are five safety rules for working on 230-volt mains: isolate, secure against re-energisation, verify absence of voltage, cover adjacent live parts, obtain clearance.
Do you know them by heart? If not, that’s not a criticism – but it’s a clear signal: this work belongs in professional hands. Section 13 of the German Low Voltage Connection Regulation (NAV) states exactly that: work on 230-volt mains may generally only be carried out by registered qualified electricians. This video and this article help you understand the principles and prepare yourself as well as possible – but the actual work belongs with a professional.
Want Shelly or Home Assistant Installed Professionally?
This section is a paid collaboration with Gerlach Smart Solutions.
Anyone who’d rather hand off the installation usually runs into two problems: most electricians don’t know Shelly and tend to recommend expensive proprietary systems instead. And even when someone does install Shelly, the service typically ends with the last screw – automations and setup are left to you. Because anyone who wants to use Shelly or Home Assistant professionally needs more than individual devices: a solution that fits the electrical installation, the building, and the desired functions – and is properly installed, configured, and commissioned afterwards.
Gerlach Smart Solutions does exactly that. Benjamin Gerlach is a master electrician and DEKRA-certified expert, specialised in open systems like Shelly and Home Assistant. The focus is on retrofitting existing buildings – roller shutters, lighting circuits, energy monitoring, PV surplus use – as well as well-thought-out smart home solutions in new builds. The service is a complete package: free initial assessment, selection of appropriate components, professional installation by qualified electricians – followed by setup, optimisation, remote maintenance, and programming of scenes, schedules, and automations. From planning to a finished, everyday-ready smart home, nationwide across Germany.
If you want to install yourself but aren’t yet sure about product selection, planning, or preparation: Gerlach also offers consultancy. And if you’re using your own electrician, you can request a complete planning document as a basis.
You remain in full control of your own system. No cloud lock-in, no dependency on the service provider for every small change.
👉 Request a free initial assessment
Use code SICHER25 to save €25 on a subsequent installation booking.
Summary
Five mistakes, all avoidable. Check the neutral wire situation beforehand. Verify that the space is sufficient. Use the right tools. Connect properly: observe the correct strip length, always use ferrules with stranded wire, never tin it. And never work at a flush-mount box without properly isolating the circuit first.
Have you made any of these mistakes yourself – or do you know other Shelly pitfalls? Let me know in the comments under the video.
* Affiliate links. As an Amazon Associate I earn from qualifying purchases. No additional cost to you.