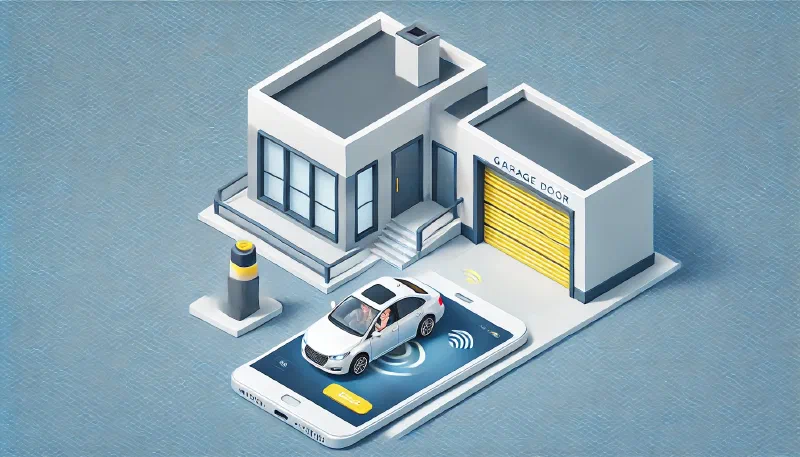
I had an old Shelly 1 lying around and a garage door I still had to open with a remote control – like it was 20 years ago. One afternoon later, that was sorted. The door has been opening via app, via automation, and when needed even from vacation ever since.
This was roughly my third video on the channel. I had no big expectations – and it turned out to be the most-watched video I’ve ever published. Apparently this is a topic a lot of people care about. If you want to see what I did with it a year later, check out Smart Garage 2.0 afterwards.
Prerequisites
All you need is a smart relay – a small switch that can be controlled electronically. In my case that’s an old first-generation Shelly 1 I had lying around. New Shellys are available for around €10 (buy here – affiliate link, or directly at Shelly: buy here – affiliate link, code SMARTHOMEABERSICHER-10OFF for 10% off). If you want to not just open but also close your garage door – because it doesn’t do that automatically – then two Shellys with one output each, such as two Shelly 1 Mini Gen3 (buy here – affiliate link, or at OBI: buy here – affiliate link, or directly at Shelly: buy here – affiliate link, code SMARTHOMEABERSICHER-10OFF for 10% off), are the better choice. These can also run on 12V/24V DC and can therefore be powered directly from the door controller’s power supply.
You’ll also need to spend a bit of time researching the correct way to wire the relay to your specific garage door. I’ll explain how to do that without deep electronics knowledge – and how I did it for my garage door – in the sections below.
Finally, make sure you have Wi-Fi coverage at your garage door, or if your smart relay uses Zigbee or Bluetooth, that you have adequate signal there.
How It Works
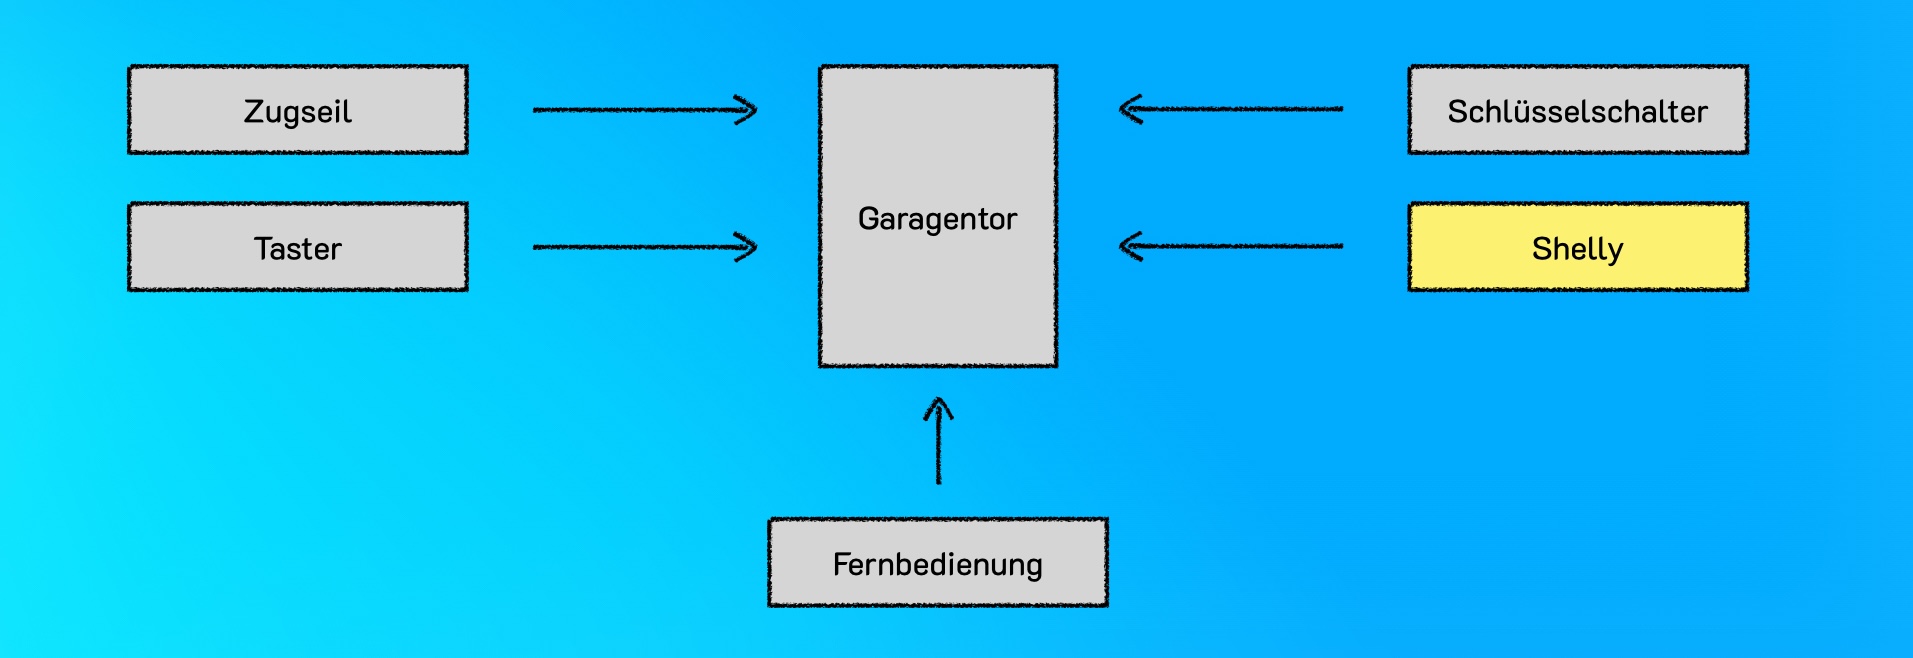
Garage doors can often be opened via a key switch on the outside of the door or push buttons and pull cords on the inside. There are also usually proprietary wireless remotes. The buttons and switches are typically connected to what’s called a potential-free contact on the door controller. This means these contacts carry no current until they are activated by closing the switch – they work essentially like a simple light switch that doesn’t pass current until someone presses it. Wireless remotes work on the same principle: the remote’s receiver ultimately closes one of these contacts to trigger the door to open. We can use this to our advantage by simply connecting our Shelly in parallel to the door controller, so the Shelly becomes an additional way to control the door.
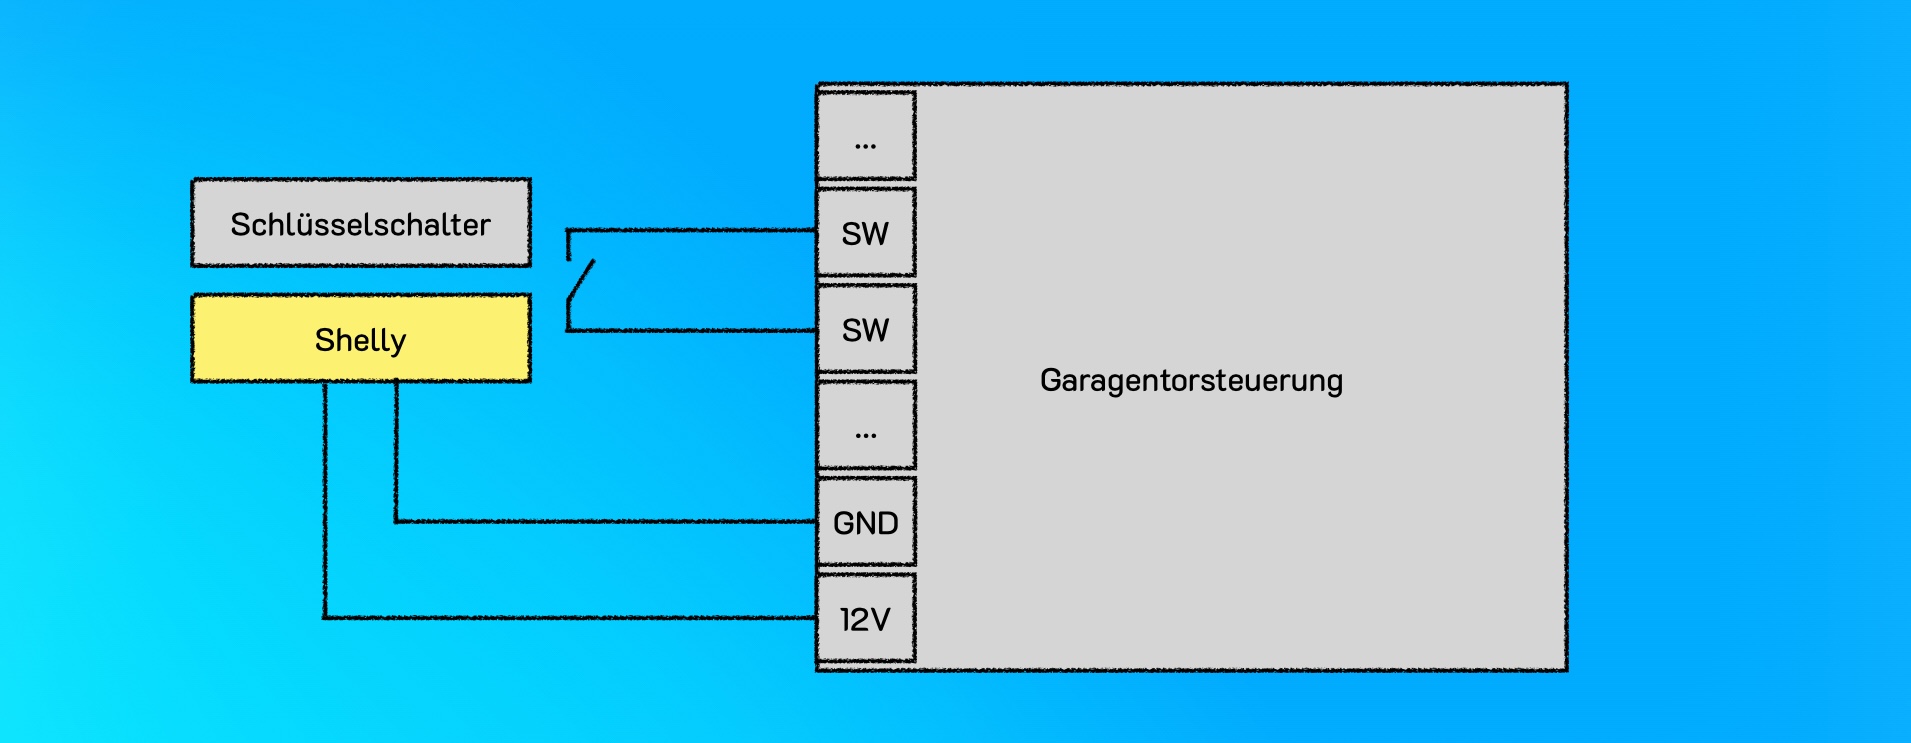
Let’s take a closer look at the exact wiring. Here we can see the key switch connected to the switching contacts, which are bridged when the key is turned. We can connect the Shelly in exactly the same way – in parallel to the existing wiring. Of course, the Shelly also needs power. Here we take advantage of the fact that the garage door controller’s power supply typically provides 12V or 24V for accessories via dedicated contacts in the housing. It’s convenient that the Shelly can run on 12V or 24V DC, making this connection safe even for non-technical users.
Installing the Shelly
So we need to find two suitable contacts through which the Shelly can control the garage door, plus two connections for the Shelly’s power supply.
I’ll walk you through this using my own door controller as an example: a TS 971 by GfA Elektromaten. But the approach is always the same.
Let’s look at the technical manual for the garage door, which I found on the manufacturer’s website without much searching – all the relevant information is printed right there. On page 14, under the heading “Push button/Radio receiver”, you’ll find what we need:
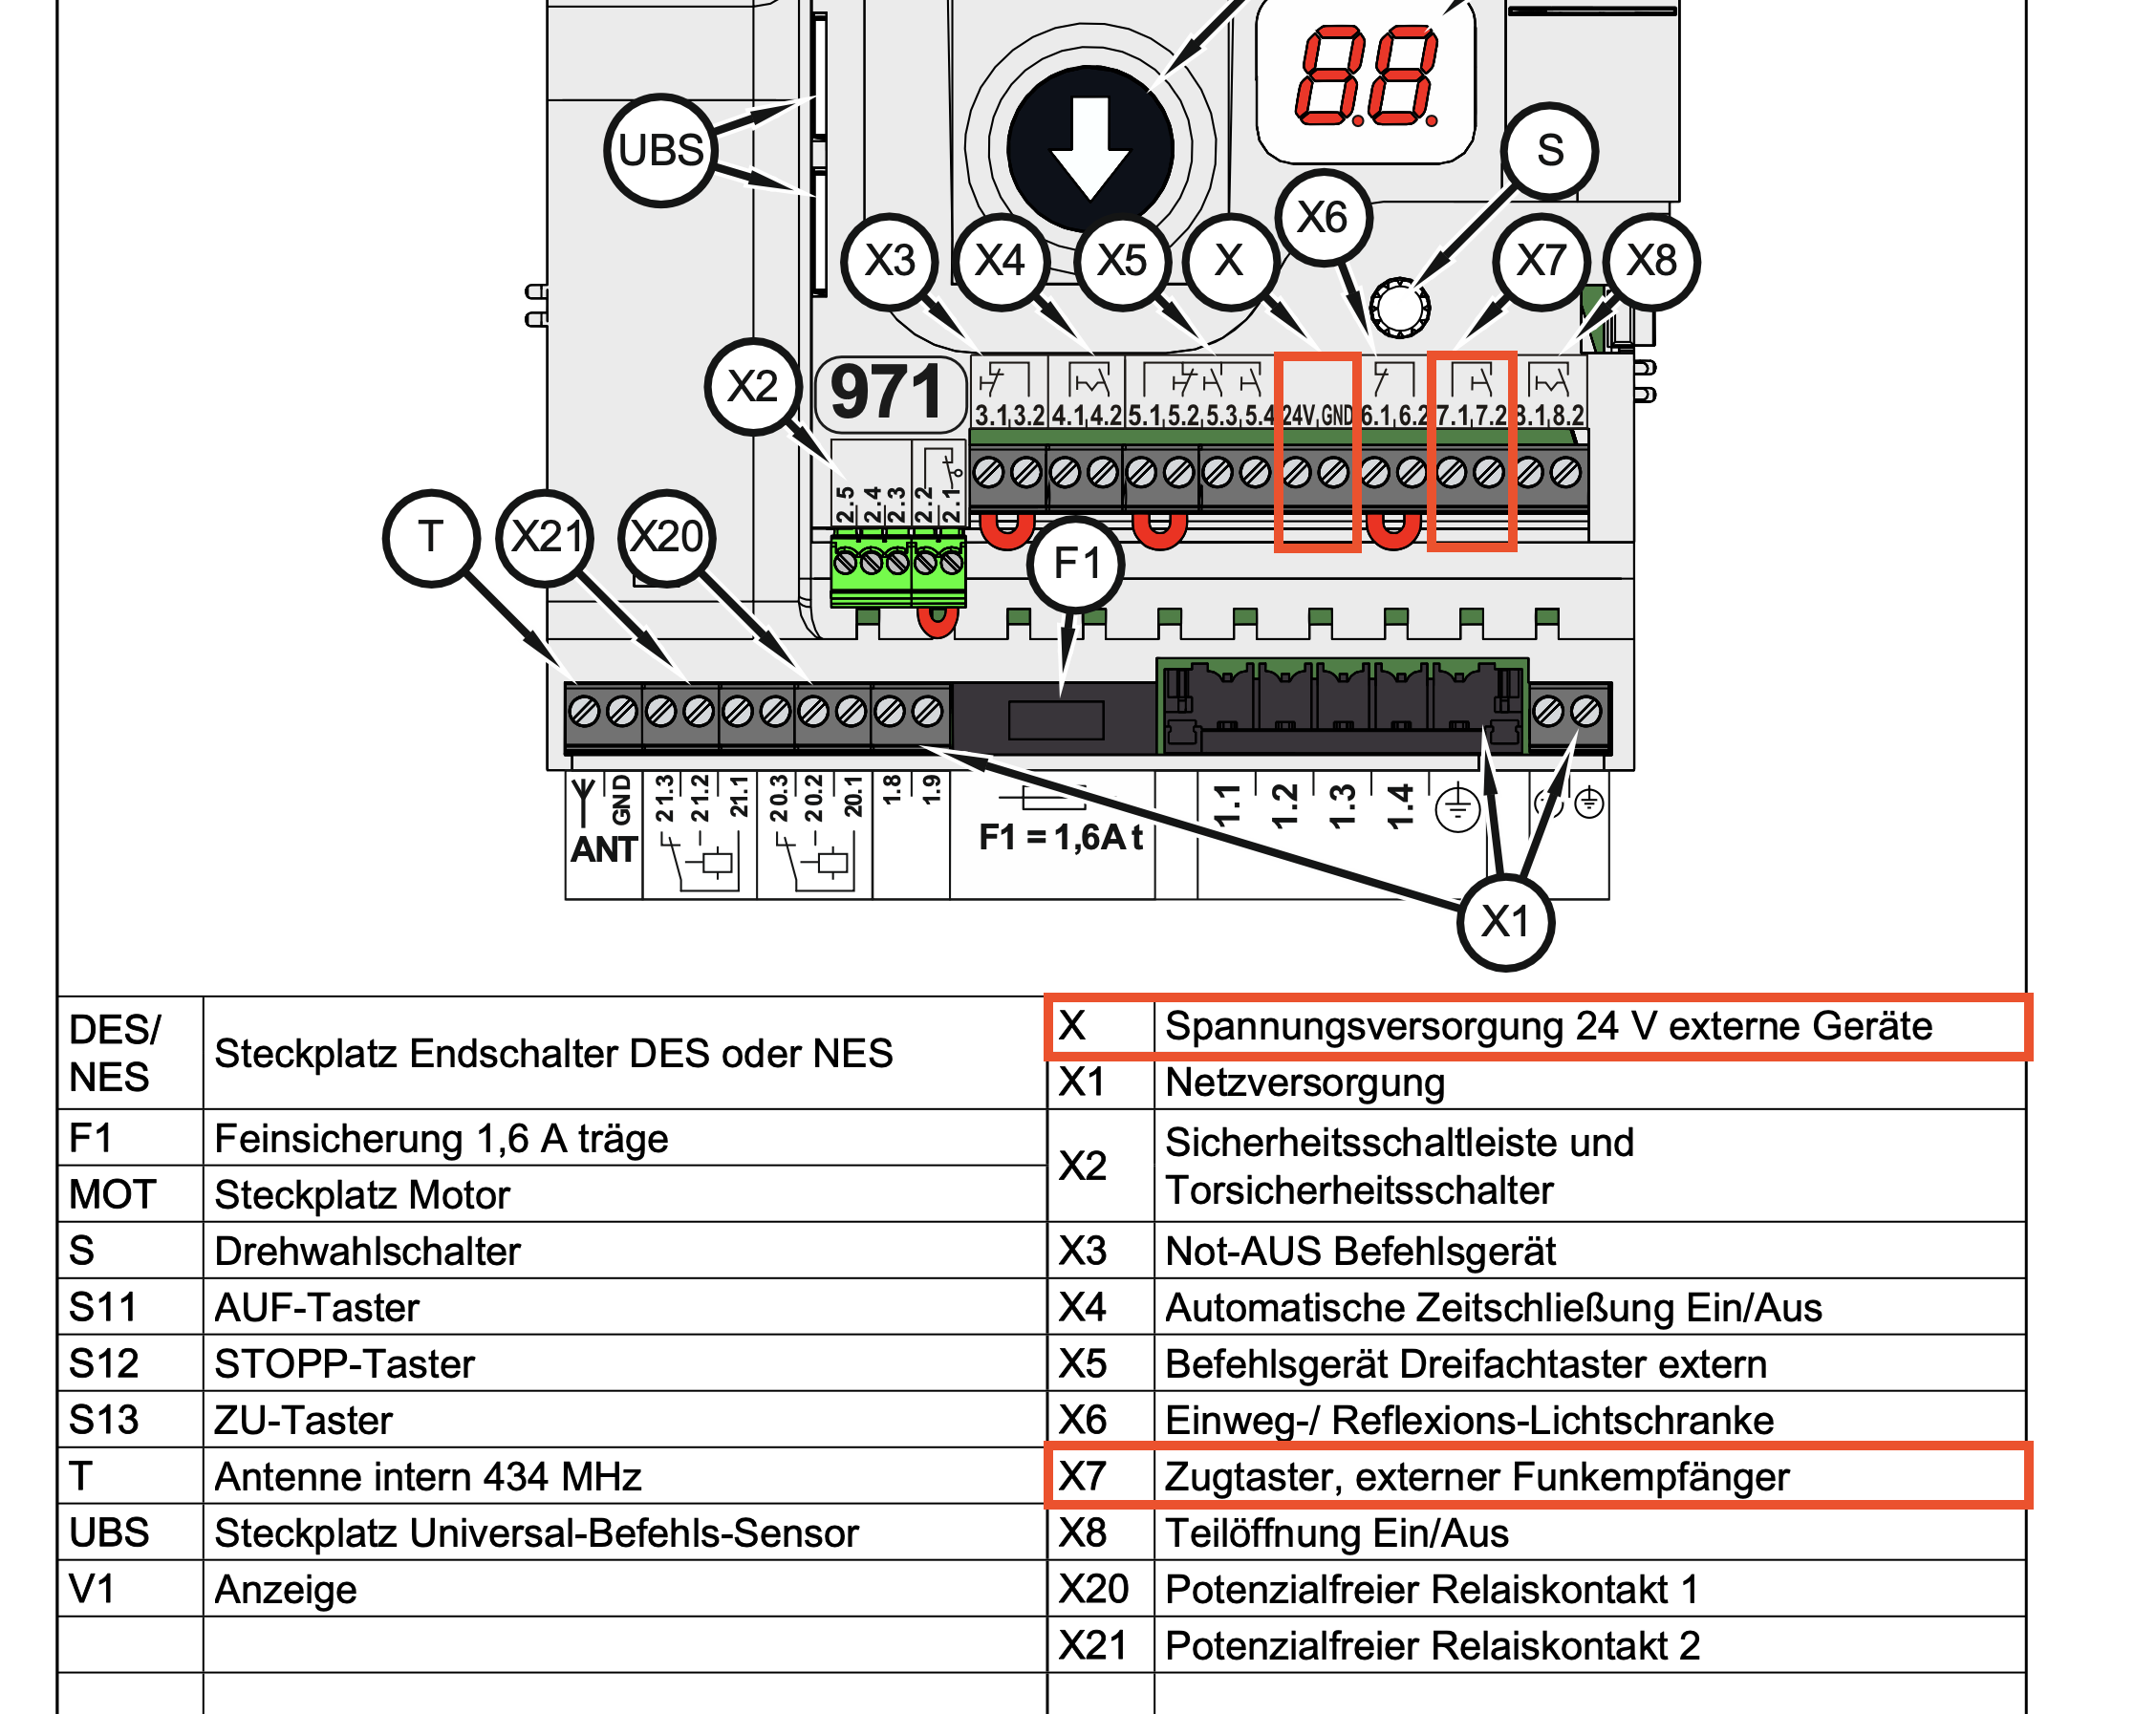
Here you can see that the key switch is connected to contacts 7.1 and 7.2. You can also see that 24V DC is available via the 24V and GND contacts.
Once you’ve found suitable contacts for power and for triggering the opening and/or closing, you can simply connect the Shelly. Concretely: connect the “I” and “O” terminals of the Shelly to contacts 7.1 and 7.2 on the door controller, and connect “N” to 24V and “L” to GND. Ideally there’s even space inside the existing housing, as was the case for me:
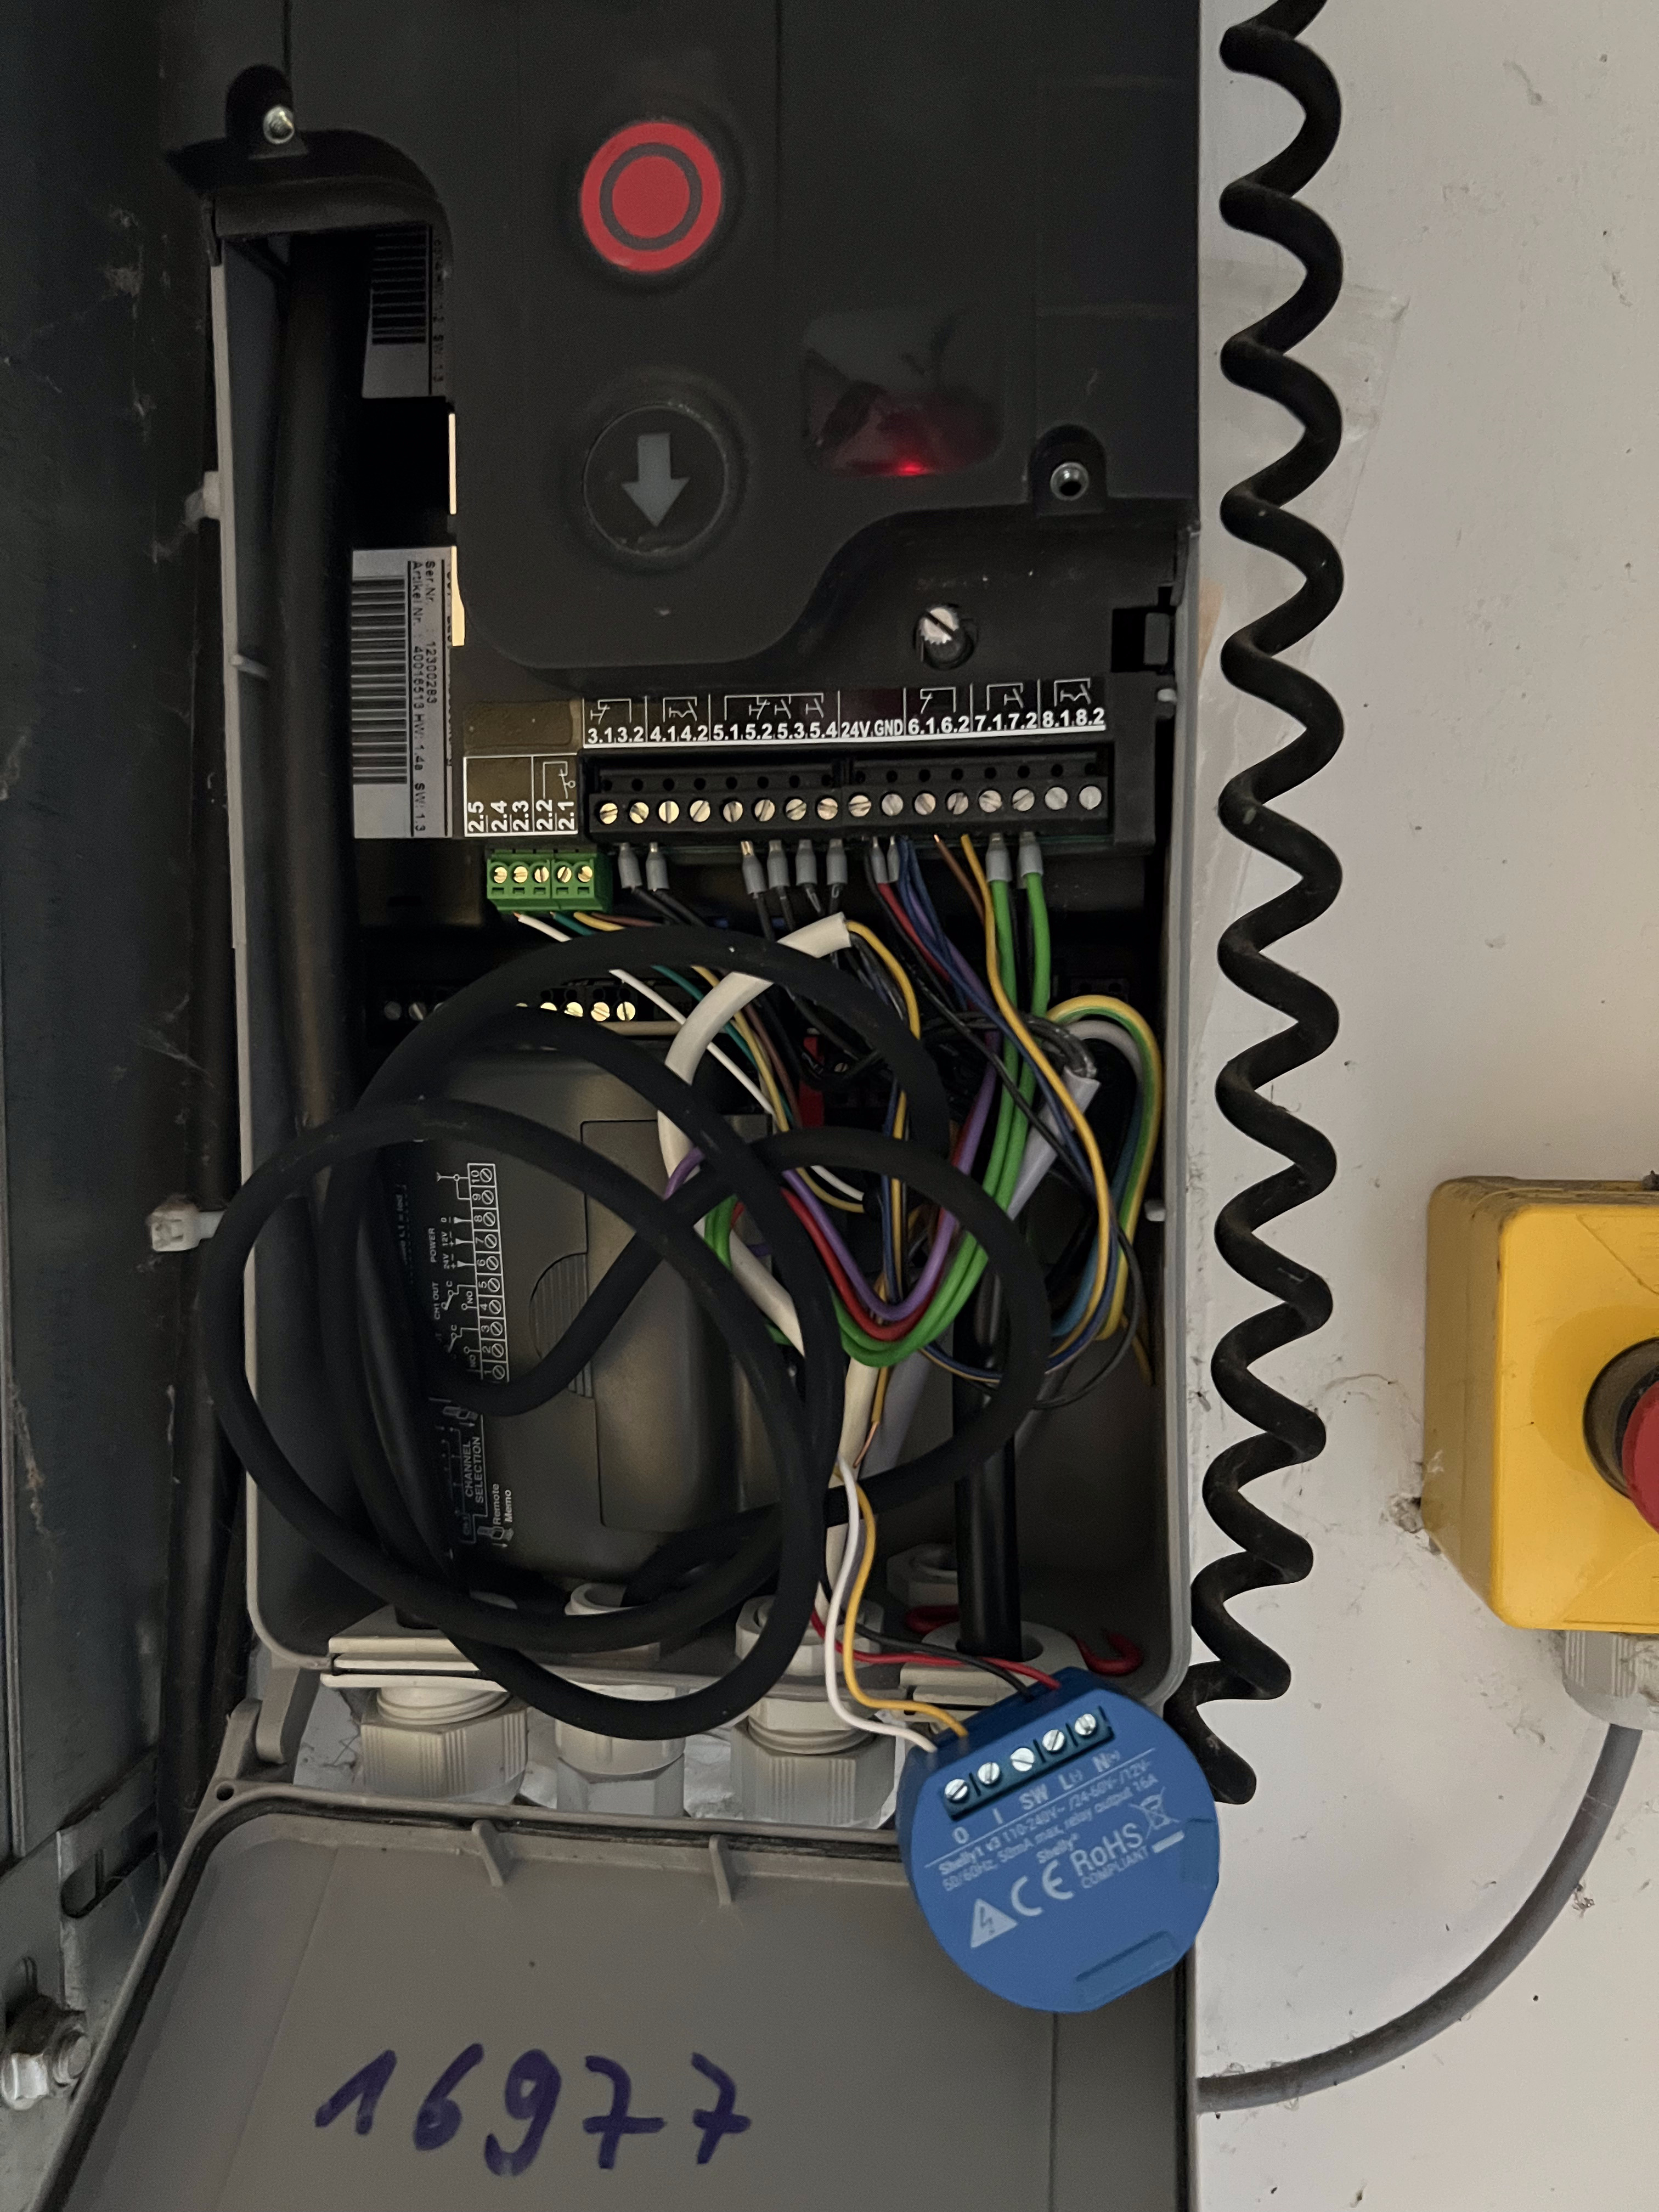
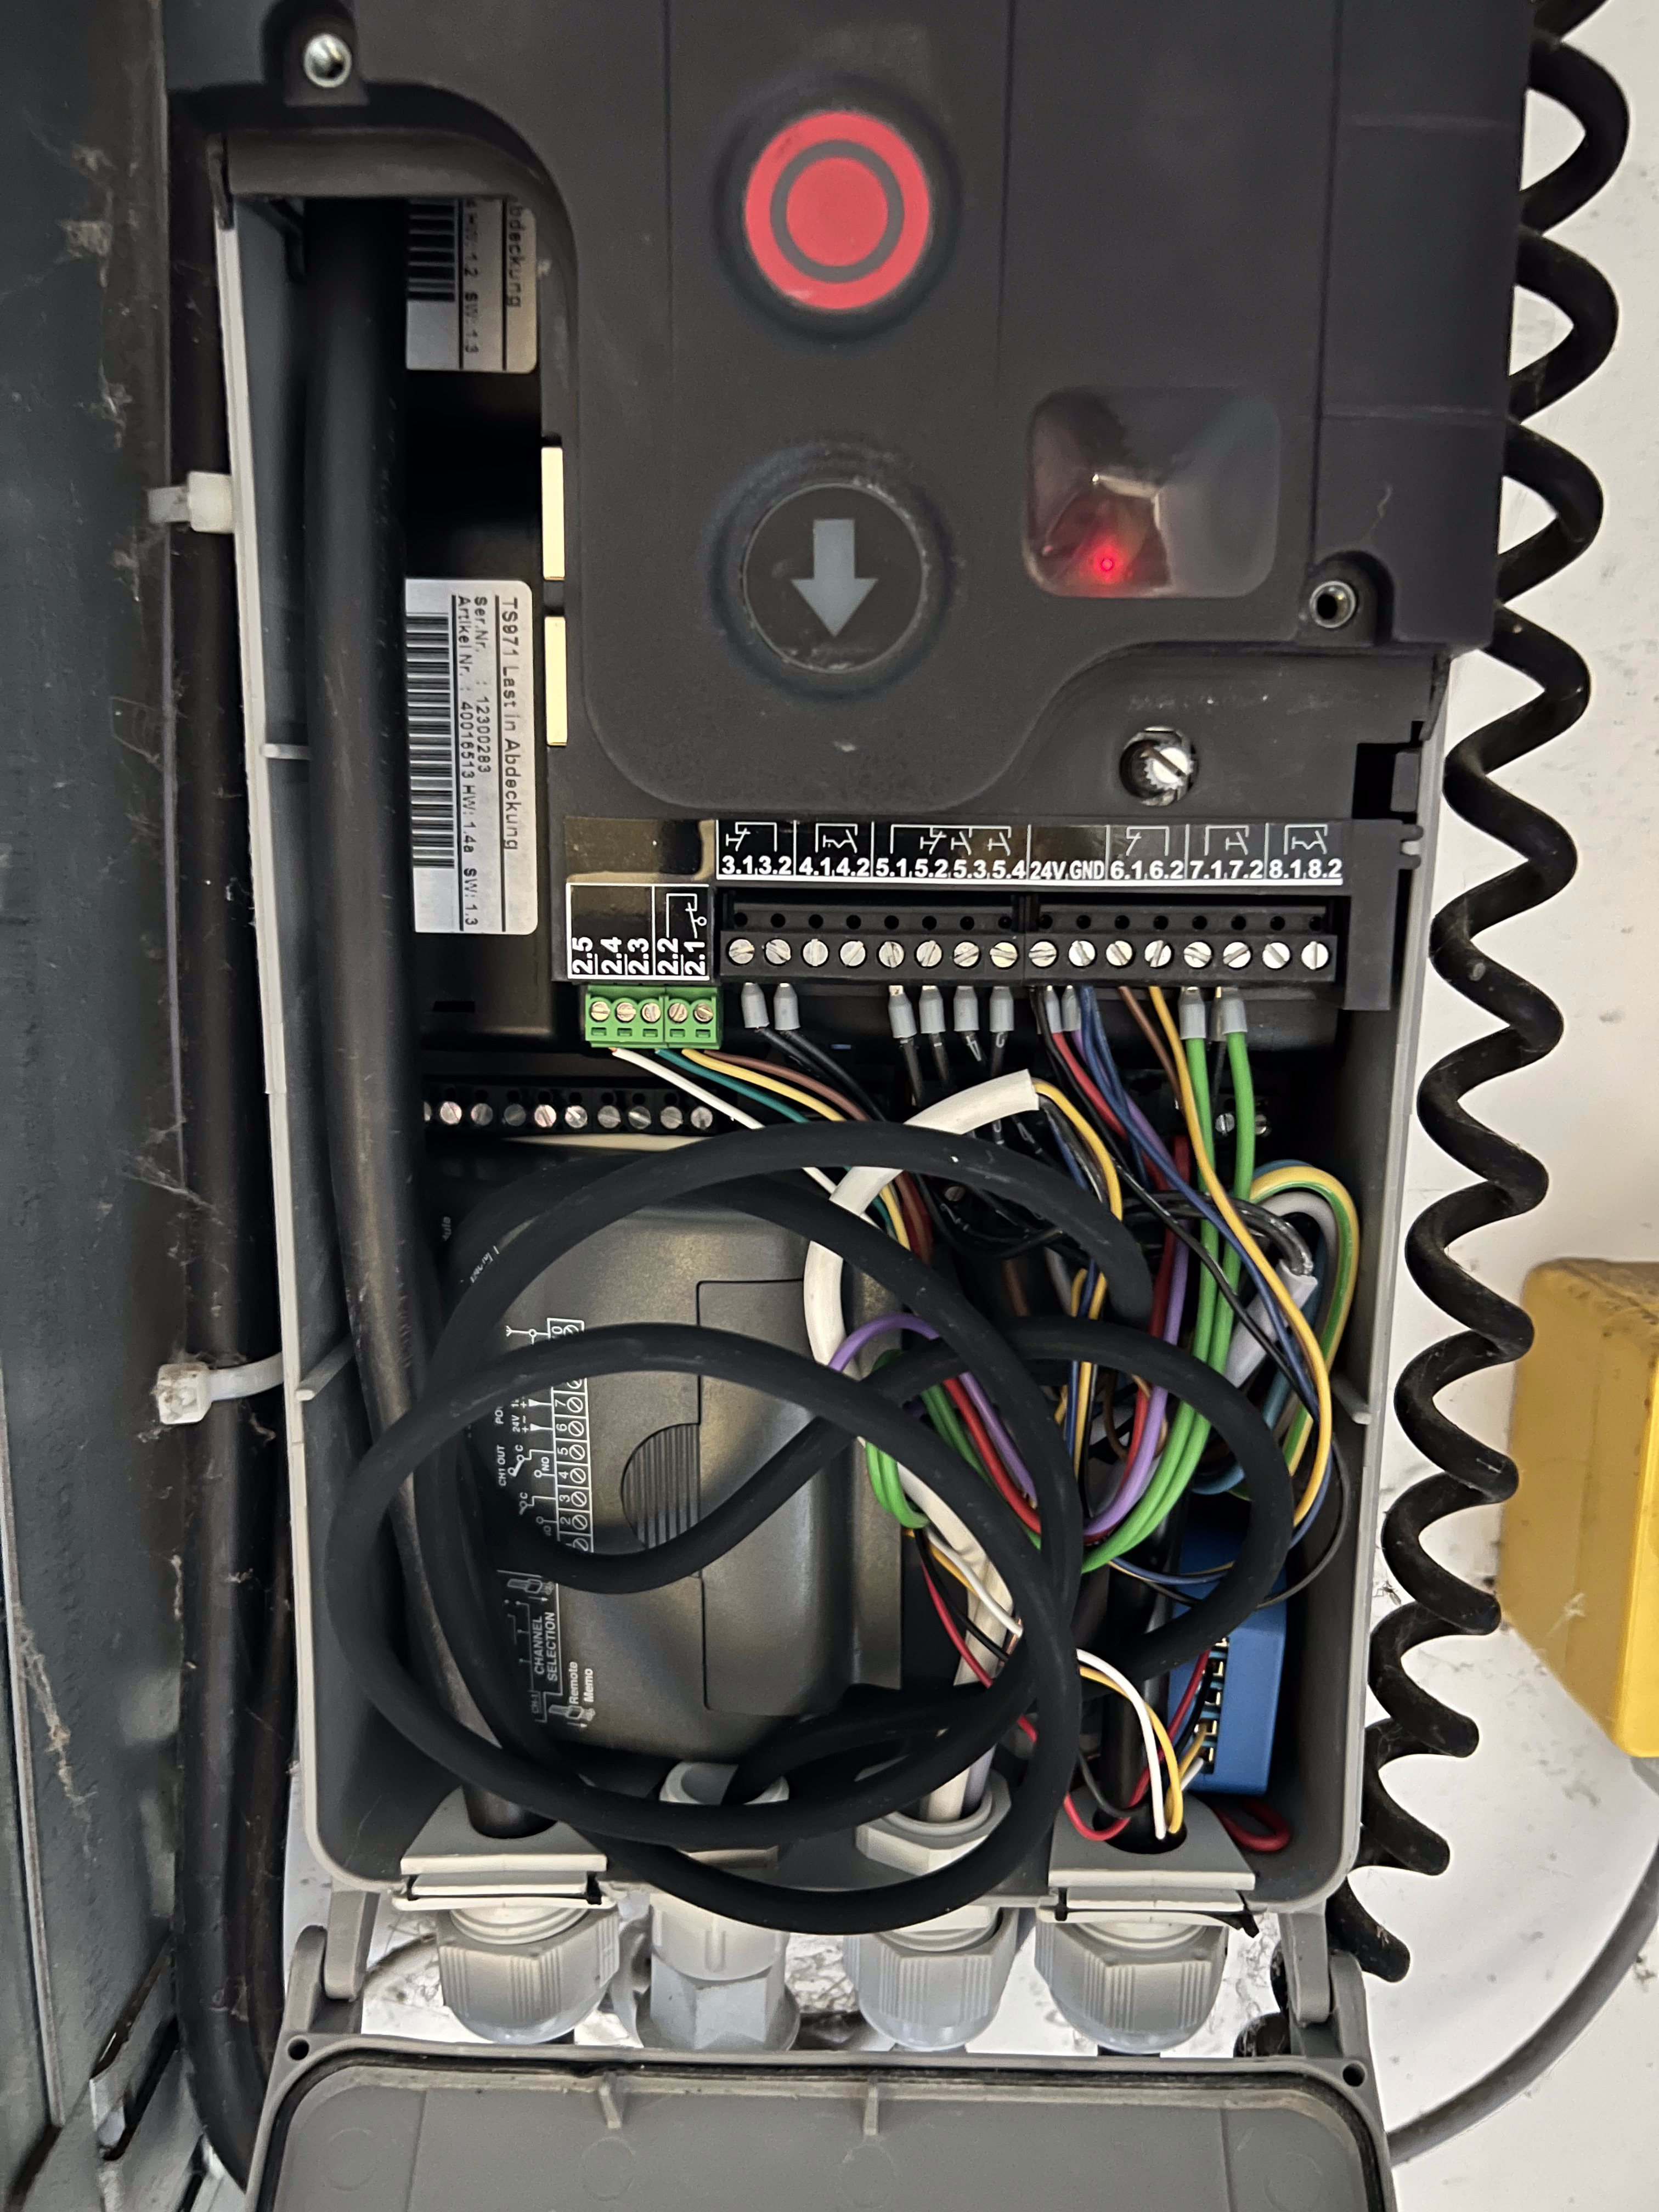
Note: For the Shelly 1, move the power supply jumper for 12V DC operation – those little jumper bridges under the cover. If your door runs on 24V, it can be left unchanged.
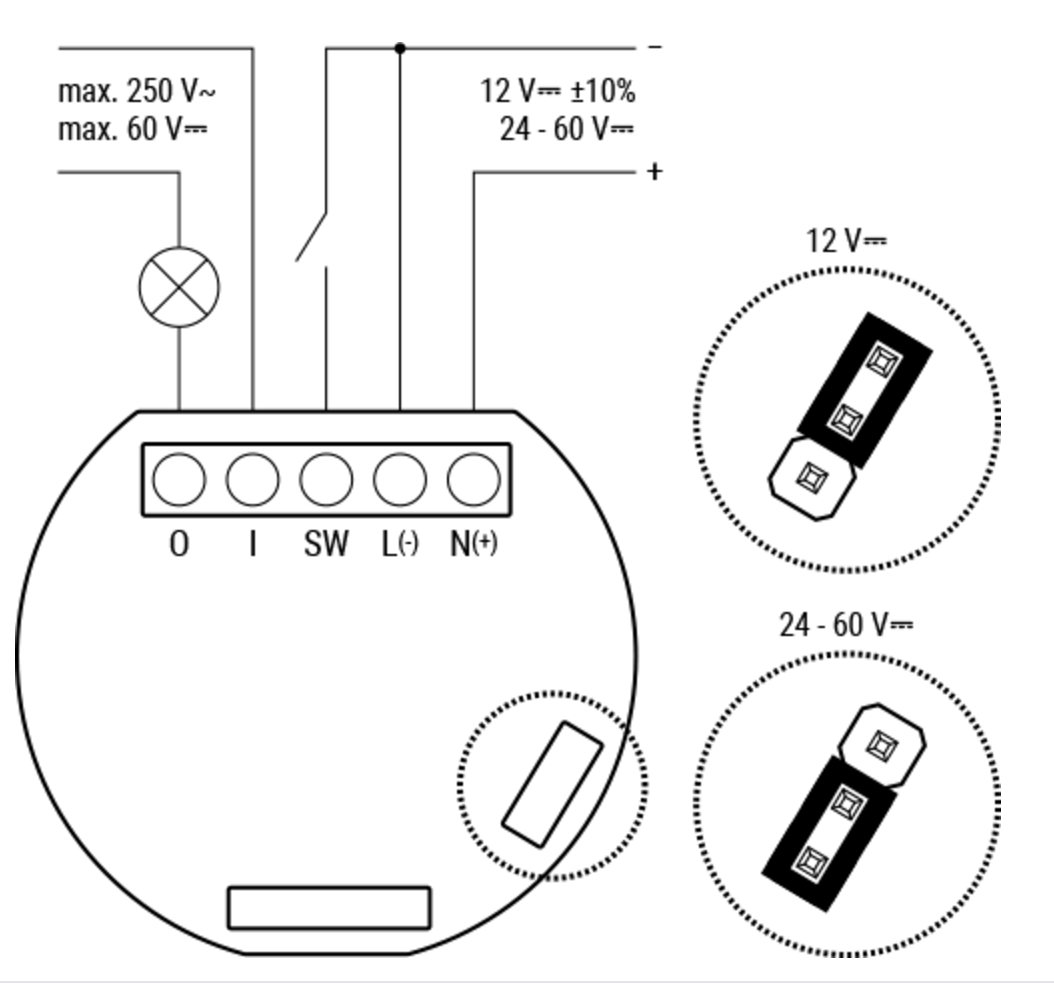
Source: https://kb.shelly.cloud/knowledge-base/shelly-1
If you’re using a newer Shelly 1 Plus, it has separate terminals depending on the voltage, so no jumpers need to be changed.
Conclusion
And that’s it – you’ve successfully integrated your garage door into your smart home. The Shelly can now be controlled flexibly, either via the Shelly app or through your preferred smart home hub. Ideally also remotely over the internet.
This means your garage door can finally be opened when you’re still a street or two away, with far greater range than a traditional remote. But make sure the Shelly setup is just as secure as your front door! Access must be well protected so that nobody can gain entry to your garage – and potentially your home.
That means:
- a strong password
- up-to-date firmware
- no open ports to the internet
- and ideally a VPN connection or SSH tunnel into your home network
Of course, other smart relays can be used instead of Shellys. Get creative and find the best solution for your situation! And if you can’t find a way to wire up a relay at all, a Switchbot (buy here – affiliate link) might also be an option for you.
Questions about wiring or security configuration? Drop them in the comments – the garage door topic has an active community, and most problems have already come up there before.
Note: Links marked with affiliate link are affiliate links. As a partner of various retailers and manufacturers (e.g. Amazon, OBI via the Awin network, Shelly) I earn from qualifying purchases. This means I receive a small commission if you purchase through these links — at no extra cost to you. The revenue helps me run this blog and YouTube channel and keep creating content. Thank you for your support!
― Joachim
Related Articles
- Smart Garage 2.0: Garage Door, Lights & Automations with Shelly Blue – One year later: my complete garage upgrade with motion sensors, wallbox automation, and CarPlay control
- Making Roller Shutters Smart with Shelly – The same principle for blinds: Shelly local, no cloud
- No More Annoying Thermostats! Shelly Makes Your Heating Smart – More Shelly in action: this time for heating control